西部数码主机 | 阿里云主机| 虚拟主机 | 服务器 | 返回乐道官网
当前位置: 主页 > php教程 > ecshop教程 >

ecshop添加KindEditor编辑器的最完整方法

时间:2014-08-07 00:32来源:未知 作者:好模板 点击:
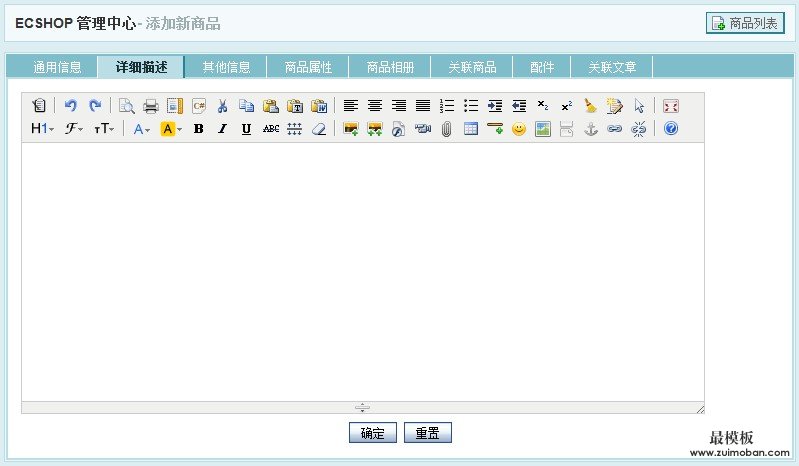
echop默认是使用FCKeditor编辑器,这样对于要在商品描述里面批量插入图片的用户来说大大的不方便,现在我们来为ecshop添加KindEditor编辑器,让用户可选 FCKeditor和 KindEditor 效果如下: 1、

echop默认是使用FCKeditor编辑器,这样对于要在商品描述里面批量插入图片的用户来说大大的不方便,现在我们来为ecshop添加KindEditor编辑器,让用户可选 FCKeditor 和 KindEditor

效果如下:

ecshop添加KindEditor编辑器的最完整方法


1、添加 KindEditor 编辑器到 ecshop

1)从 KindEditor 官网下载最新的编辑器包 -> http://kindeditor.net/down.php

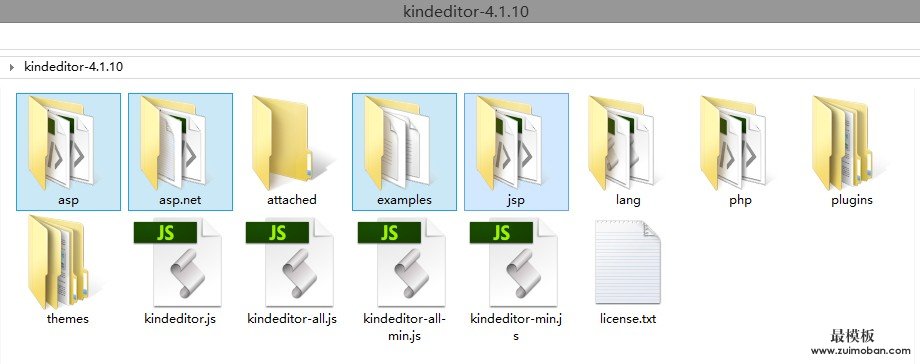
解压后删除里面多余的其他语言文件夹 asp asp.net jsp 和 examples(examples为演示文件)

ecshop添加KindEditor编辑器的最完整方法

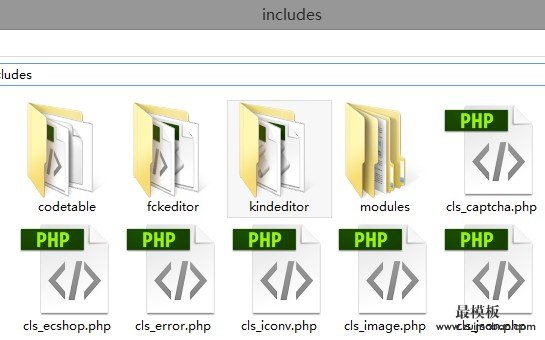
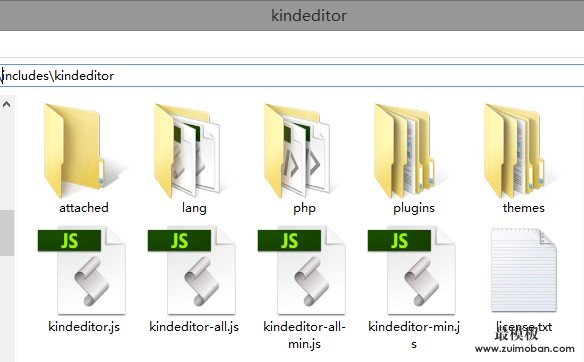
再把文件夹 kindeditor-4.*.** 重命名为 kindeditor,并复制到 ecshop 网站目录下的 include 文件夹下

ecshop添加KindEditor编辑器的最完整方法ecshop添加KindEditor编辑器的最完整方法

2) 为了让上传的图片统一跟ecshop存放的目录相同,我们还要修改:

includes/kindeditor/php/upload_json.php 上传存放目录 改成

//文件保存目录路径
$save_path = $php_path . '../../../images/upload/';
//文件保存目录URL
$save_url = $php_url . '../../../images/upload/';

includes/kindeditor/php/file_manager_json.php 浏览服务器路径

//根目录路径,可以指定绝对路径,比如 /var/www/attached/
$root_path = $php_path . '../../../images/upload/';
//根目录URL,可以指定绝对路径,比如 http://www.yoursite.com/attached/
$root_url = $php_url . '../../../images/upload/';

3)接着在ecshop程序中加载kindeditor编辑器,打开 admin\includes\lib_main.php 大概 332 行,

$smarty->assign('FCKeditor', $FCKeditor);

修改成下面代码:

//$smarty->assign('FCKeditor', $FCKeditor);	//注释掉默认加载的FCKeditor编辑器
$kindeditor="
<textarea id=\"$input_name\" name=\"$input_name\" style='width:100%;height:300px;'>$input_value</textarea>
<script charset='utf-8' src='../includes/kindeditor/kindeditor-min.js'></script>
<script>
	var editor;
	KindEditor.ready(function(K) {
		window.editor = K.create('textarea[name=\"$input_name\"]', {
			allowFileManager : true,	//浏览远程服务器按钮
			width : '100%',	//宽
			height : '320px',	//高
			resizeType : 2,	//2或1或0,2时可以拖动改变宽度和高度,1时只能改变高度,0时不能拖动
			afterBlur : function(){this.sync();}	//afterBlur当失去焦点时执行 this.sync(); ->取得textarea的value
		});
	});
</script>";
    $smarty->assign('FCKeditor', $kindeditor);

4)更新缓存,我们来添加商品和编辑商品看效果:

ecshop添加KindEditor编辑器的最完整方法

2、为用户选择编辑器做一个选项开关

1) 商店设置 -> 显示设置 插入一个编辑器选项,数据库插入SQL语句:

INSERT INTO ecs_shop_config (id, parent_id, code, type, store_range, store_dir, value, sort_order) VALUES (NULL, '3', 'editor', 'select', '1,0', '', '1', '1');

2) languages\zh_cn\admin\shop_config.php 最底下加入语言显示

$_LANG['cfg_name']['editor'] = '文本编辑器';
$_LANG['cfg_range']['editor']['0'] = 'FCKeditor';
$_LANG['cfg_range']['editor']['1'] = 'KindEditor';

3) 加上选择的判断,打开 admin\includes\lib_main.php

function create_html_editor($input_name, $input_value = '')
{
..
}

整个function 修改成


function create_html_editor($input_name, $input_value = '')
{
    global $smarty;

    $editor = new FCKeditor($input_name);
    $editor->BasePath   = '../includes/fckeditor/';
    $editor->ToolbarSet = 'Normal';
    $editor->Width      = '100%';
    $editor->Height     = '320';
    $editor->Value      = $input_value;
    $FCKeditor = $editor->CreateHtml();
	//$smarty->assign('FCKeditor', $FCKeditor);	//注释掉默认加载的FCKeditor编辑器
	$kindeditor="
	<textarea id=\"$input_name\" name=\"$input_name\" style='width:100%;height:300px;'>$input_value</textarea>
	<script charset='utf-8' src='../includes/kindeditor/kindeditor-min.js'></script>
	<script>
		var editor;
		KindEditor.ready(function(K) {
			window.editor = K.create('textarea[name=\"$input_name\"]', {
				allowFileManager : true,	//浏览远程服务器按钮
				width : '100%',	//宽
				height : '320px',	//高
				resizeType : 2,	//2或1或0,2时可以拖动改变宽度和高度,1时只能改变高度,0时不能拖动
				afterBlur : function(){this.sync();}	//afterBlur当失去焦点时执行 this.sync(); ->取得textarea的value
			});
		});
	</script>";
    $Ceditor = $GLOBALS['_CFG']['editor'] ? $kindeditor : $FCKeditor ;
    $smarty->assign('FCKeditor', $Ceditor);
}

大功告成,这样用户后台可以自由选择使用 FCKeditor 或者 KindEditor 。

(责任编辑:好模板)
顶一下
(20)
87%
踩一下
(3)
13%
------分隔线----------------------------