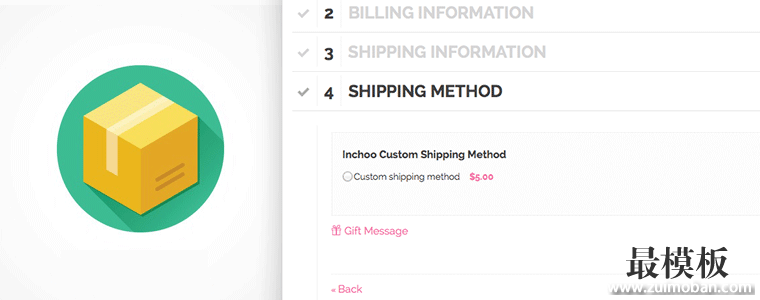
在这篇文章中我将演示如何在Magento中编写自定义的邮寄方式。准确说来分为标准邮寄(standard shipping)和快递邮寄(express shipping)。只有当你购买的产品超过指定重量时才可能邮寄。首先说明下Magento如何处理邮寄以及为完成我们的目标需要些什么。 当寻找可用的邮寄方式是,Magento首先收集所有可用的载体(carriers)。一个“Carrier” 代表一个承运商,就像现实世界中的(例如联邦快递)。每一个载体都被表现在扩展自Mage_Shipping_Model_Carrier_Abstract的类。 在列出接受的载体后,邮寄方式信息(表现为Mage_Shipping_Model_Rate_Request)被送到载体去检索所有可用的费率,结果表现在Mage_Shipping_Model_Rate_Result。 这个过程发生在Mage_Shipping_Model_Shipping::collectRates()的这段代码里:
...
$carriers = Mage::getStoreConfig('carriers', $storeId);

foreach ($carriers as $carrierCode => $carrierConfig) {
    $this->collectCarrierRates($carrierCode, $request);
}
...
collectCarrierRates()功能负责确认载体是否可用以及触发你的类中的collectRates()功能。 这大致就是在屏幕后所发生的事。现在,针对上面所讲我们要写一些代码。首先你要做的就是创建一个基于Mage_Shipping的模型。除了标准的模型配置外你还需要将以下代码放入你的config.xml:
<config>
    ...
    <default>
        ...
        <carriers>
            <alwayly_shipping>
                <active>1</active>
                <model>alwayly_shipping/carrier</model>
                <title>Alwayly Shipping Carrier</title>
                <sort_order>10</sort_order>
                <sallowspecific>0</sallowspecific>
                <express_max_weight>1</express_max_weight>
            </alwayly_shipping>
        </carriers>
        ...
    </default>
    ...
</config>
sallowspecific和express_max_items配置条目,我们稍后解释。我们将从模型条目开始。如你所见,我们的载体表现在 Alwayly_Shipping_Model_Carrier,所以让我们实现在个类吧。前面提到的,载体需要扩展自Mage_Shipping_Model_Carrier_Abstract 并且实现Mage_Shipping_Model_Carrier_Interface来确认Magento能使用它。我们将以下面的代码开始:
class Alwayly_Shipping_Model_Carrier
    extends Mage_Shipping_Model_Carrier_Abstract
    implements Mage_Shipping_Model_Carrier_Interface
{
    protected $_code = 'alwayly_shipping';
接着,getAllowedMethods() 以key-value 形式的数组返回所有可用的方法。这正是我们的接口需要的,我们这么实现:
public function getAllowedMethods()
{
    return array(
        'standard'    =>  'Standard delivery',
        'express'     =>  'Express delivery',
    );
}
最后,我说过费率被collectRates()收集。这个功能将邮寄信息转换为字段,返回所有可用的费率。它还确定哪些费率可用于给定的要求。
public function collectRates(Mage_Shipping_Model_Rate_Request $request)
{
	/** @var Mage_Shipping_Model_Rate_Result $result */
	$result = Mage::getModel('shipping/rate_result');

	/** @var Alwayly_Shipping_Helper_Data $expressMaxProducts */
	$expressMaxWeight = Mage::helper('alwayly_shipping')->getExpressMaxWeight();

	$expressAvailable = true;
	foreach ($request->getAllItems() as $item) {
	    if ($item->getWeight() > $expressMaxWeight) {
		$expressAvailable = false;
	    }
	}

	if ($expressAvailable) {
	    $result->append($this->_getExpressRate());
	}
	$result->append($this->_getStandardRate());

	return $result;
}
如你所见,代码很明了。购物车里的产品重量都和设定的值做对比,由此来决定是否用快递费率每一种费率都是通过Mage_Shipping_Model_Rate_Result_Method 对象到append()这个我们的结果对象。我们通过alling _getExpressRate()和_getStandardRate()来获取这些费率对象,下面是代码:
protected function _getStandardRate()
{
    /** @var Mage_Shipping_Model_Rate_Result_Method $rate */
    $rate = Mage::getModel('shipping/rate_result_method');

    $rate->setCarrier($this->_code);
    $rate->setCarrierTitle($this->getConfigData('title'));
    $rate->setMethod('large');
    $rate->setMethodTitle('Standard delivery');
    $rate->setPrice(1.23);
    $rate->setCost(0);

    return $rate;
}
功能类已经完成。我们最后通过system.xml文件来添加后台配置。这里是代码的缩略版:
<config>
    <sections>
        <carriers>
            <groups>
                <alwayly_shipping translate="label">
                    ...
                    <fields>
                        <active translate="label">
                            ...
                        </active>
                        <title translate="label">
                            ...
                        </title>
                        <sallowspecific translate="label">
                            ...
                            <frontend_type>select</frontend_type>
                            <frontend_class>shipping-applicable-country</frontend_class>
                            <source_model>adminhtml/system_config_source_shipping_allspecificcountries</source_model>
                            ...
                        </sallowspecific>
                        <specificcountry translate="label">
                            ...
                            <frontend_type>multiselect</frontend_type>
                            <source_model>adminhtml/system_config_source_country</source_model>
                            ...
                        </specificcountry>
                        <express_max_weight translate="label">
                            ...
                        </express_max_weight>
                    </fields>
                </alwayly_shipping>
            </groups>
        </carriers>
    </sections>
</config>
值得注意的是,active, title, sallowspecific 和specificcountry是被Magento自动处理的。所以除了把这些添加到后台外你什么也不用做。这里有两个有趣的选项,第一个是sallowspecific,告诉Magento运营商是否对所有国家可用,或者只针对specificcountry中指定的国家。这样,在支付页面添加邮寄方式的需求就实现了。 (责任编辑:好模板) |
Magento中自定义邮寄方式
时间:2017-01-03 11:03来源:未知 作者:好模板 点击:次
在这篇文章中我将演示如何在Magento中编写自定义的邮寄方式。准确说来分为标准邮寄(standard shipping)和快递邮寄(express shipping)。只有当你购买的产品超过指定重量时才可能邮寄。首
顶一下
(0)
0%
踩一下
(0)
0%
------分隔线----------------------------
- 热点内容

-
- Magento邮件模板存放路径
修改Magento邮件模板要先找到Magento的邮件模板文件的存放路径(...
- 安装完Magento2之后,ICON不见了怎么
您有没有这样子的困扰,在安装完Magento2 及sample date之后,兴冲...
- 在本地用xampp主机上安装 Magento 2.
如你所知,Magento 2.0 Alpha 版本已被释放,在 2015 年 12 月,当然,...
- 解决magento后台无法登陆/登陆没有反
解决magento后台无法登陆/登陆没有反应的方法...
- 在Magento单个店铺用所有语言和本地
你是否尝试过在Magento单个页面用所有语言打印一条信息? 首先...
- Magento邮件模板存放路径
- 随机模板
-
-
 ecshop电器商城模板
人气:497
-
 ecshop仿好乐买模板|ecshop鞋
人气:712
-
 lumi化妆品商网店城|ecsho
人气:442
-
 黑色苹果简洁风格|ecshop外
人气:1458
-
 食品食材模板|ecshop食品模
人气:552
-
 Milano跨境电商综合商城m
人气:171
-

