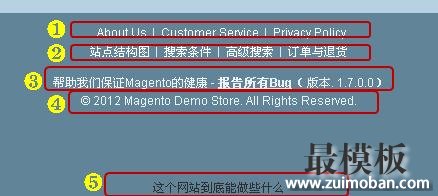
agento页脚分为三部分,如下图所示:  Part ❶: 由CMS中名字为footer_links的Block定义,内容如下:
Part ❷: 由layout各文件定义 如:"订单与退货"就是由sales.xml中定义的
Part❶ ❷连接代码在cms.xml
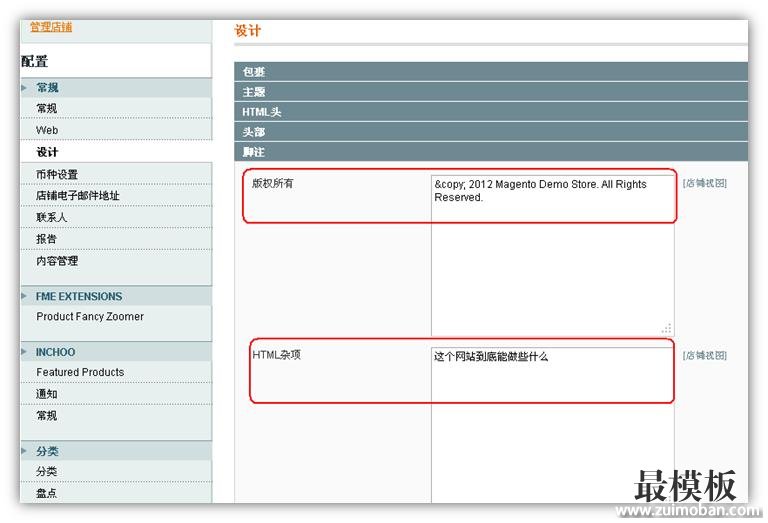
Part ❸: $MAGE_BASEDIR/app/design/frontend/base/default/template/page/html/footer.phtml定义 该段文本硬编码在footer.html文件中 Part ❹❺:参看下图  如何定制? 如果想定制Part❶,修改CMS Block; 定制Part❷分为增加和移除条目: 增加:在自己的layout xml文件中增加addLinks action 移除:在自己的layout xml文件或者local.xml增加代码例:
但是注意:“联系我们”如果使用removeLinkByUrl方法可能需要硬编码传入url值;一种可能方式是通过后台设置使之禁止,见下图:  不过你要知道这样做的后果是,该页面功能将被屏蔽,即通过直接url也不能访问之。 定制Part❸ : 重定义footer.phtml Part ❹❺: 自不必说 最彻底的、最直接的方法是: 重定义footer.html!(责任编辑:好模板) |
Magento页脚定制详细方法
时间:2016-10-13 22:59来源:未知 作者:好模板 点击:次
agento页脚分为三部分,如下图所示: Part ❶: 由CMS中名字为footer_links的Block定义,内容如下: Php代码 ul liahref= {{storedirect_url= about-magento-demo-store }} AboutUs/a/li liahref= {{storedirect_url= customer
顶一下
(0)
0%
踩一下
(0)
0%
------分隔线----------------------------
- 热点内容

-
- Magento在CMS中按属性调用产品
Magento最强大的功能之一是它的灵活性。随着CMS的功能,您可以创...
- Magento后台简单更换favicon.ico
刚才需要更换Magento网站的favicon.ico,就是浏览器url前面的那个小...
- Magento可配置产品价格不根据选项变
Magento可配置产品价格不根据选项变化, 1.浏览器查看js pre name=c...
- 自动填写Magento进货地址字段
自动填写Magento进货地址字段,在这种情况下,你需要为这个插件...
- 解决Magento Cross Sell产品的一个小B
Magento三种产品关联形式之一的Cross Sell是在checkout/cart购物车页面...
- Magento在CMS中按属性调用产品
- 随机模板
-
-
 Magento主题模板外贸创意模
人气:457
-
 ecshop仿跨境通2016整站模板
人气:947
-
 ecshop免费模板之趣玩2013最
人气:5831
-
 ecshop免费模板之仿缤购网
人气:4043
-
 Luxury高端时尚magento主题模
人气:116
-
 ecshop免费服装商城网店模
人气:3874
-

